Why Native Ads Are the Smartest Choice for App Monetization in 2025

Why Native Ads Are the Smartest Choice for App Monetization in 2025

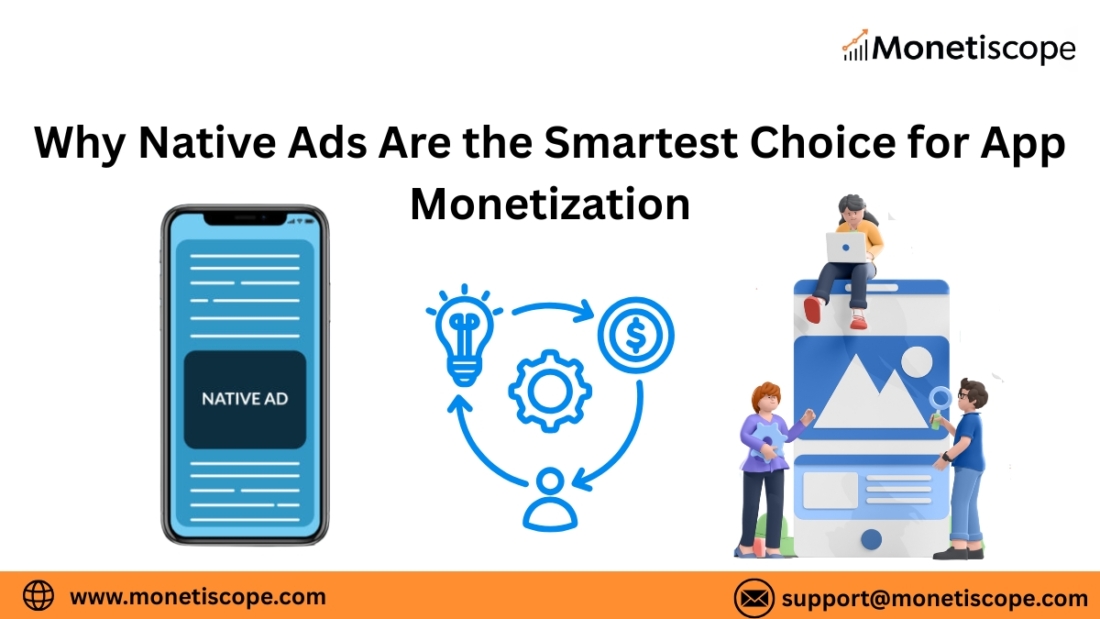
In 2025, app developers face fiercer competition than ever. Users demand smooth experiences. Privacy regulations tighten. Ad fatigue sets in. Under these pressures, native ads emerge not just as an option—but often as the smartest choice for monetization. They balance revenue with user experience, adapt to shifting tech, and offer room for growth. In this article, I’ll walk you through why native advertising stands out in 2025, how to do it well, and what challenges to watch.

What Are Native Ads — and Why They Matter Now

Before diving into advantages, let’s define native ads in this context. A native ad is an ad format that blends into the app’s content or UI. It doesn’t scream “look at me”—it feels like part of the flow. It can show up as sponsored posts in a feed, recommended content tiles, in-feed video cards, or promoted items in content lists.

What makes native ads critical now:

  • User expectations have matured. Users reject intrusive banners and full-screen popups. They expect content that respects context.
  • Privacy rules demand smarter targeting. With stricter limits on identifiers and third-party cookies, context and engagement-based targeting gain traction.
  • eCPM trends favor native formats. Across markets, native ads often command higher CPMs than standard banner units. AnyMind Group
  • Content-heavy apps thrive with native. In apps built around streams, feeds, or content (news, social, media), native ads integrate more organically and perform better than interruptive formats. Adjust+1

Given these realities, native ads combine relevance, revenue, and retention more gracefully than many alternatives.

Key Advantages of Native Ads for App Monetization in 2025

Below, I break down the main reasons native ads shine this year.

1. Seamless User Experience (Less Disruption)

Native ads slip into the app in a way users don’t feel being “advertised at.” Because they match the look and feel, they don’t jolt the user or break immersion.

  • Lower annoyance: Users tolerate native ads more because they don’t interrupt flow.
  • Better retention: Poor ad experiences lead users to abandon apps; native helps avoid that.
  • Consistent UI: You maintain your app’s visual style and experience.

When you roll out native ads thoughtfully, you preserve trust and make ad interactions feel natural. That’s critical in 2025, when users are less forgiving of disruptions.

2. Better Performance Metrics (CPM, CTR, Engagement)

Native units often outperform banners and even interstitials in key metrics:

  • Higher click-through rates (CTR) and viewability because users perceive them as content, not mere ads.
  • Elevated eCPMs (effective cost per mille) thanks to better engagement. Data from Q1 2025 suggests native units continue to command premium rates over banners. AnyMind Group
  • Superior conversions: since native ads blend with content, they tend to generate more qualified traffic, not random clicks.

In short: advertisers are willing to pay more for native placements, which boosts revenue for app publishers.

3. Contextual & Privacy-Safe Targeting

With evolving privacy regulations (e.g. limits on device identifiers, stricter user consent), many traditional targeting levers are weakening. Native ads lean heavily on context and behavior—both of which remain viable.

  • Contextual targeting: Show ads based on what a user is reading, watching, or interacting with.
  • First-party data: Use engagement signals within your app to inform ad personalization.
  • Less reliance on third-party trackers: Because native ads fit content, they can deliver relevance without invasive data usage.

Thus, native ads align well with the “privacy-first” path the ad industry is on.

4. Flexibility & Format Variety

Native is not monolithic. You can adapt it across different formats and devices:

  • In-feed content (text, image, video)
  • Sponsored listings or products integrated into content lists
  • Video-native cards embedded in streams
  • Native recommendation widgets (e.g. “you may like”)
  • Carousel-style native ads

This flexibility allows app owners to experiment, optimize layouts, A/B test placements, and find formats that best suit each user segment.

5. Hybrid Monetization & Synergy with Other Models

Most successful apps in 2025 won’t rely on one monetization channel. They use a hybrid model—ads + subscriptions + in-app purchases. Native ads slot in more gracefully in that mix.

  • For non-paying users, native ads deliver value without erosion.
  • You can gate premium features, while using native ads for free tiers.
  • Native ad income can scale without cannibalizing your paid offerings.

Hence, native ads act as a strong ad leg in hybrid monetization systems. RevenueCat+1

6. Scalability & Yield Optimization via Programmatic & AI

In 2025, programmatic buying and AI-driven optimization rule ad tech. Native ads benefit strongly from that.

  • Dynamic creative optimization (DCO): serve multiple creative variants and choose the best performing ad in real time. arXiv
  • Smart bidding and yield optimization: use AI to optimize which native ad fills a slot for max revenue.
  • Broad demand sources: connect to multiple DSPs, SSPs, ad exchanges to fill native slots.
  • Automation: reduce manual setup by letting algorithms dynamically adapt placements, rotate creatives, optimize revenue.

As ad technology evolves, native formats remain a first-class citizen in modern ad stacks.

7. Lower Ad Fatigue & Higher Retention

Because native ads feel like content, they are less prone to ad fatigue—the “banner blindness” or “skip reflex” users develop over time.

  • Less saturation: users won’t instinctively ignore them.
  • Stronger long-term retention: good ad experiences help maintain user loyalty.
  • Better brand perception: users see that your app “respects” them and doesn’t bombard them with intrusive ads.

In an era when user retention is a key metric, that benefit can pay off.

Practical Strategies to Make Native Ads Work

Having advantages only helps if you implement smartly. Here’s how to make native monetization deliver in your app.

Strategy 1: Place Ads in Natural Breakpoints

Don’t shove native ads in at arbitrary spots. Insert them where the user expects pauses or content transitions.

  • Between feed items or chapters
  • After a few pieces of native content
  • In recommendation widgets (“You Might Also Like”)
  • At session boundaries

This way, native ads feel part of the flow, not interruptions.

Strategy 2: Use A/B Testing & Iteration

Test placement, style, imagery, copy, and frequency. Constantly iterate based on performance metrics (CTR, retention impact, revenue lift).

  • Rotate creative variants
  • Test placement positions
  • Experiment with native ad density per session
  • Monitor user engagement and churn metrics

Iterative optimization helps you find the sweet spot between monetization and user happiness.

Strategy 3: Segment Audiences

Not all users respond the same. Tailor native ad experiences per cohort.

  • New users: lighter ad load; focus on acclimation
  • Mid-tier users: moderate native exposure
  • Casual users: fewer ads
  • High-engagement users: more aggressive native units

Segmentation ensures you don’t drive away high-value users with excessive ad pressure.

Strategy 4: Blend with Rewarded & Interstitials (when appropriate)

Native ads don’t have to be your only format. Use rewarded video or interstitials in premium zones of your app—but keep native as the backbone.

  • Offer rewarded video as opt-in for bonuses
  • Use interstitials sparingly at natural breaks
  • Let native ads cover most content flow

This balance gives flexibility while keeping user experience intact.

Strategy 5: Enrich with Data, Signals & Context

Feed your ad system more signals to help it optimize insertion and creative selection.

  • Use content metadata (topic, category, tags)
  • Use session context (time of day, page depth, dwell time)
  • Use first-party behavior (past interactions, preferences)
  • Use context signals (device, OS version, network)

The richer your signal set, the more relevant and less intrusive native ads can be.

Strategy 6: Monitor and Protect UX/RPI (Revenue per Interaction)

Watch metrics like session length, retention, churn, and user feedback. Always ask: is this ad placement hurting long-term value?

  • Set guardrails: e.g. don’t show more than X native ads per session
  • Do cohort analysis: does heavy exposure correlate with dropouts?
  • Offer ad-free premium tiers
  • Use proper frequency caps

Revenue matters, but so does preserving the heart of your app.

Challenges & Risks (And How to Mitigate Them)

Native ads aren’t magic; they come with pitfalls. Here are risks you should guard against:

Risk 1: Mis-matching style / clashing UI

If your native ad looks too different from your app, it will feel jarring. Worse, if it’s too camouflaged, it may feel misleading.

Mitigation: enforce design policies, build template ad units that match your UI theme, slightly differentiate “sponsored” labels clearly.

Risk 2: Overload & saturation

Too many native placements kill the effect and annoy users.

Mitigation: cap counts, stagger placements across sessions, segment exposure per user.

Risk 3: Demand mismatch

You may not always find advertisers for your native slots, leading to low fill or fallback to low-paying ads.

Mitigation: connect with multiple networks, maintain fallback inventory, rotate ad sources, integrate header bidding for higher competition.

Risk 4: Performance lag / latency

Complex ad rendering or creative calls may slow the app, harming UX.

Mitigation: lazy-load ads, cache creative assets, prefetch placements, keep ad payload lightweight.

Risk 5: Misleading or low-quality ads

If the advertisers you accept have bad offers or scammy content, your brand suffers.

Mitigation: vet demand partners, enforce quality policies, block undesirable categories.

Risk 6: Tracking & attribution complexity

Native ads with deeper integrations may complicate attribution and measurement, especially under privacy constraints.

Mitigation: use privacy-safe attribution models, rely more on aggregated metrics, partner with ad platforms supporting compliant measurement.

Why Native Ads Will Grow Stronger in 2025 and Beyond

Let me close by emphasizing how native ads will continue to sharpen their edge moving forward.

  1. Programmatic & AI will favor flexible formats. As ad systems grow smarter, they’ll optimize toward formats that adapt well to content—and native fits that naturally.
  2. Omnichannel native expansion. Native ads don’t just live inside apps. They expand into in-app web, smart devices, in-chat content, AI assistants, wearables, etc. SmartyAds
  3. Ad budgets will shift toward quality and engagement. Brands will pay more for ads that perform well in real environments. Native’s stronger engagement metrics will attract budget.
  4. Contextual and first-party signals will dominate. As third-party data declines, native ads can better leverage context for relevance.
  5. App-first behavior will deepen. Users already spend most of their mobile time in apps, so native monetization remains strategically well placed. blasto.ai+1

Thus, what is smart today will grow more so tomorrow.

Summary (at a Glance)

BenefitDescription
Seamless UXNative ads blend into content flow without disruption
Stronger monetizationHigher CTRs, better eCPMs, superior conversions
Privacy-friendly targetingWorks via context and first-party signals
Versatile formatsCan adapt to many layouts and use cases
Fits hybrid modelsComplements subscriptions, IAPs, etc.
Scalability with AIWorks well with programmatic and dynamic optimization
Lower fatigueUsers less likely to ignore or resent native units

By laying proper strategy, maintaining UX guardrails, and continuously optimizing, native ads become a foundation you can scale with.

FAQ (Frequently Asked Questions)

What types of apps benefit most from native ads?

Apps with content feeds, social apps, news apps, streaming & media apps, product catalog apps, and discovery platforms often benefit most. Their structure suits embedding ads seamlessly.

Can gaming apps use native ads?

Yes—though less commonly. Some games integrate rewarded native content, in-feed discovery units, or in-menu native placements. But many games still prefer optimized video or interstitial creatives.

Won’t users feel tricked?

Only if you hide “Sponsored” labels or camouflage ads deceptively. Always mark native units clearly with labels like “Sponsored,” “Promoted,” or “Ad.” Transparency builds trust.

How many native ads per session is safe?

There’s no universal number. Many apps start with 1–3 per session and monitor retention metrics. Use A/B testing to find a safe cap that doesn’t degrade UX.

What about fill rate issues?

Low fill can occur if demand is limited. Mitigate by integrating multiple ad networks, using mediation layers, header bidding across demand sources, and fallback units. Don’t rely on a single demand partner.

How do you measure native ad success?

Track CTR, viewability, eCPM, conversion rates, retention impact, churn by ad exposure, session length, and long-term user value. Also segment by cohorts to spot anomalies.

Can native ads coexist with subscription or premium models?

Absolutely. Use native ads in free tiers while offering ad-free versions for paying users. Or limit native exposure for subscribed users. The hybrid model benefits everyone.

    GA4 + Google Ad Manager: How to Track Ad Revenue

    GA4 + Google Ad Manager: How to Track Ad Revenue More Effectively

    Tracking ad revenue has always been a challenge for publishers and app developers. You may earn money from ads, but without the right tracking setup, you cannot see what’s working and what’s not. This is where Google Analytics 4 (GA4) and Google Ad Manager (GAM) come together as a powerful combination.

    GA4 helps you understand user behavior, while Google Ad Manager gives you complete control over ad serving and revenue reporting. When you connect both, you can track ad revenue more effectively and take smarter monetization decisions.

    In this guide, we’ll explore how GA4 and GAM work together, why integration matters, and step-by-step methods to optimize revenue tracking.

    Simply put, GA4 + Google Ad Manager: How to Track Ad Revenue More Effectively gives you both traffic and revenue insights under one roof.

    Why Combine GA4 and Google Ad Manager?

    Let’s start with the basics. GA4 tracks user activity across websites, apps, and connected devices. Google Ad Manager manages ad inventory, serves ads, and reports revenue.

    When you connect them:

    • You see which traffic sources bring more ad revenue.
    • You track ad impressions, clicks, and earnings within GA4.
    • You align user engagement data with ad monetization.
    • You get a full picture of ROI from different campaigns.

    Without this integration, you might only see half of the story. GA4 shows traffic but not earnings, while GAM shows earnings but not user engagement. Together, they close the loop.

    Step 1: Setting Up GA4 for Revenue Tracking

    Before you link GA4 and GAM, make sure GA4 is properly configured.

    1. Create a GA4 Property

    If you haven’t already, create a GA4 property in your Google Analytics account. GA4 supports websites, apps, and hybrid setups.

    2. Install GA4 Tag

    For websites, use Google Tag Manager or gtag.js to install GA4. For apps, integrate GA4 with Firebase. This ensures all user events are captured.

    3. Enable Monetization Reports

    In GA4, enable Monetization Reports. These show in-app purchases, subscriptions, and ad revenue once data flows in.

    4. Define Key Events

    Track events like page views, scrolls, video plays, and conversions. These help you analyze which user actions generate ad exposure and revenue.

    Step 2: Setting Up Google Ad Manager for Tracking

    Now let’s prepare GAM for integration.

    1. Generate Ad Tags

    Ad Manager requires ad tags to serve ads on your site or app. Make sure your ad units are properly labeled and structured.

    2. Enable Revenue Reports

    In GAM, enable reports that break down revenue by ad units, devices, countries, and demand sources.

    3. Connect GAM with Google Ad Exchange or Other Networks

    If you’re using Google Ad Exchange, enable programmatic revenue tracking. This ensures detailed reporting.

    4. Activate Data Transfer

    For advanced users, GAM offers Data Transfer Files. These files provide raw data that can be analyzed in BigQuery or connected to GA4.

    Step 3: Linking GA4 with Google Ad Manager

    Now comes the important part—connecting GA4 with GAM.

    1. Link Google Ad Manager with Google Analytics 4

    In your GA4 Admin settings, go to Product Links and select Ad Manager. Add your GAM account.

    2. Enable Data Sharing

    Check the box for Revenue Metrics Sharing. This allows GA4 to pull ad revenue directly from GAM.

    3. Map Ad Units to GA4 Events

    When a user sees an ad or clicks it, GAM sends data. In GA4, these map as events like ad_impression, ad_click, or ad_revenue.

    4. Validate Data Flow

    Use Realtime Reports in GA4 to see if ad events are being captured. Cross-check with GAM to ensure accuracy.

    Step 4: Analyzing Ad Revenue in GA4

    Once data starts flowing, you can analyze revenue from different angles.

    1. Traffic Source Analysis

    See which traffic sources bring the most profitable users. For example, organic traffic may bring more engagement, while paid traffic may bring higher CPM.

    2. Audience Segmentation

    Segment audiences based on behavior. For instance, compare revenue from new vs. returning visitors. This shows which audience is more valuable.

    3. Device-Level Insights

    Track revenue across devices. Mobile traffic may bring more impressions, but desktop may have higher eCPM.

    4. Page and Content Performance

    Analyze which pages generate the most ad revenue. For example, long-form articles may drive more impressions compared to short posts.

    Step 5: Advanced Tracking with BigQuery

    For deeper insights, connect GA4 and GAM with BigQuery.

    • You can build custom revenue models.
    • You can merge ad revenue with engagement data.
    • You can forecast future ad earnings.

    BigQuery is especially useful for publishers with millions of daily ad impressions.

    Best Practices for Tracking Ad Revenue Effectively

    1. Align Metrics Between GA4 and GAM

    Ensure that impression, click, and revenue definitions match in both tools. Otherwise, you’ll see discrepancies.

    2. Track Both Fill Rate and Viewability

    Revenue depends not just on impressions, but also on how viewable ads are and whether they are filled.

    3. Use Custom Dimensions in GA4

    Define dimensions like ad placement, content category, or device type. These help you analyze performance at a granular level.

    4. Monitor Real-Time Data

    Use GA4 Realtime Reports to monitor ad revenue trends as they happen. This helps you react quickly to sudden drops or spikes.

    5. Run A/B Tests

    Test different ad placements, formats, and frequency. Use GA4 Experiments to measure how changes affect revenue.

    Common Challenges and Fixes

    Challenge 1: Data Discrepancies

    GA4 and GAM may show different revenue numbers.
    Fix: Ensure correct linking and check time zones, attribution windows, and data filters.

    Challenge 2: Limited Revenue Breakdown in GA4

    GA4’s standard monetization reports may not cover everything.
    Fix: Use BigQuery or export GAM reports for more details.

    Challenge 3: User Privacy and Consent

    GA4 may not track all users if consent is not given.
    Fix: Implement Consent Mode and comply with GDPR and CCPA.

    Future of Revenue Tracking with GA4 + GAM

    Google is continuously improving integration between GA4 and GAM. With AI-based insights and predictive metrics, publishers will soon see not just past revenue, but also forecasts for future earnings.

    As privacy rules tighten, first-party data will play a bigger role. Combining GA4’s audience insights with GAM’s revenue data will help publishers optimize ads without relying on third-party cookies.

    FAQs: GA4 + Google Ad Manager: How to Track Ad Revenue More Effectively

    Can I directly see Ad Manager revenue inside GA4?

    Yes. Once you link GA4 with Ad Manager and enable revenue sharing, you can see ad revenue in GA4 monetization reports.

    Why do GA4 and Ad Manager show different revenue numbers?

    Discrepancies happen due to attribution models, time zones, and reporting delays. Always compare data trends, not exact numbers.

    Do I need BigQuery for GA4 + GAM integration?

    Not always. Basic integration works without BigQuery. But if you need detailed analysis or forecasting, BigQuery is highly useful.

    Can I track both AdSense and Ad Exchange revenue in GA4?

    Yes. If AdSense or AdX is linked to your Ad Manager, revenue data will also flow into GA4.

    Does GA4 support in-app ad revenue tracking?

    Yes. For apps, GA4 tracks ad revenue via Firebase integration. You can see which app screens generate the most earnings.

    How can I check which content earns the most revenue?

    Use GA4’s Page and Screen Reports with revenue metrics enabled. This shows which articles, videos, or screens bring higher ad income.

    Is GA4 free for ad revenue tracking?

    Yes. GA4 is free, and linking it with Ad Manager doesn’t cost extra. BigQuery export may have costs depending on data size.

    Will cookie restrictions affect GA4 and Ad Manager integration?

    Yes. As third-party cookies fade, GA4 will rely more on modeled data and first-party tracking. Ad revenue tracking will still continue but with more aggregated insights.

    Register CTV App in Google Ad Manager Step-By-Step [2025]

    Register CTV App in Google Ad Manager Step-By-Step [2025]

    Getting your Connected TV (CTV) app monetized feels tough. But if you register CTV App in Google Ad Manager the right way, you’ll start serving high-value ads fast. This guide walks you through every step, spells out all requirements, covers CTV policy guidelines—and even shows how Monetiscope supercharges your ad revenue. Let’s get rolling!

    Why You Must Register CTV App in Google Ad Manager Now

    CTV ad spend is exploding. Advertisers clamor for OTT audiences. Rates per impression often beat mobile or desktop. Skip Google Ad Manager, and you leave money on the table. Plus, Ad Manager’s dashboard gives you full control over ad breaks, targeting, and reporting. Simple, but powerful.

    Requirements to Register CTV App in Google Ad Manager

    Before you start, gather these essentials:

    RequirementDetails
    Google Ad Manager accountActive GAM network with billing, payment set up.
    App bundle or package IDExact iOS bundle ID or Android package name.
    Supported CTV platform infoRoku channel ID, Android TV package, tvOS bundle, Samsung Tizen ID.
    Hosted app-ads.txt fileLists your publisher ID to prevent unauthorized sellers.
    Public app store listingsURLs for Google Play, App Store, Roku Channel Store, etc.

    Have these ready? Great. Now let’s dive into how to register CTV App in Google Ad Manager.

    How to Register CTV App in Google Ad Manager: Step-By-Step

    Follow these steps carefully to set up your CTV app in Google Ad Manager:

    1. Sign In / Create Account
      Visit admanager.google.com and log in. No account? Sign up—it only takes a few minutes.
    2. Go to Admin → Global Settings → Apps
      In the left menu, click Admin, then Global settings, then Apps & games (or just Apps).
    3. Click “New App”
      Hit the blue + New app button. A simple form pops up.
    4. Enter Your App Details
      • App name: Use the exact name from your store listing.
      • Platform: Pick Roku, Android TV, tvOS, Samsung Tizen, etc.
      • Bundle/Package ID: Copy-paste exactly from your store listing.
    5. Set Up Ad Units
      • Under Inventory → Ad units, click New ad unit.
      • Create units for each break type: pre-roll, mid-roll, post-roll.
      • Name clearly—e.g., “AndroidTV_Midroll_60s”.
    6. Host app-ads.txt
      • On your app’s official domain, upload app-ads.txt.

    Add this line with your publisher ID:

    google.com, pub-1234567890123456, DIRECT, f08c47fec0942fa0

    • This file stops unauthorized sellers from hijacking your inventory.
    1. Link Store Listings
      • In your app settings, add URLs for Play Store, App Store, Roku, etc.
      • Google uses this to verify your app is live and published.
    2. Submit for Review
      Double-check all fields, then click Submit for review. Google usually approves within 24–48 hours.
    3. Monitor Approval Status
      Back in Apps, watch your app’s status. Once it shows Approved, you can start trafficking creatives.

    CTV Policy Guidelines You Need to Follow

    Ignoring Google’s CTV policies can get your app suspended. Here are key rules:

    Policy AreaGuideline
    Ad breaksMax 2 mid-roll breaks per 10 minutes of content.
    Content ratingNo adult/violent content unless regionally rated.
    User interactionAds shouldn’t force remote-button clicks.
    Data & privacyComply with GDPR/CCPA if collecting any viewer data.

    Always check Google’s CTV policy page for the latest updates.

    Myth vs Truth: Google Ad Manager CTV Registration

    MythTruth
    “CTV apps need a custom SDK for every device.”Ad Manager works with standard IMA SDK or Prebid—no unique code per platform.
    “You can skip app-ads.txt on CTV.”Skipping it blocks ad serving. Always host app-ads.txt to authorize your inventory.

    How Monetiscope Helps CTV Publishers Boost Revenue

    Monetiscope offers end-to-end support so you get more from your CTV app:

    ServiceBenefit
    AdX ApprovalFast-track your network review and get live quicker.
    Ad Unit SetupWe configure optimal ad units for highest CPMs.
    Floor Price SetupDynamic floors to protect your inventory value.
    Dedicated Support Team24/7 experts to troubleshoot and optimize your setup.

    Partnering with Monetiscope means you never go it alone. Our team fine-tunes your Google Ad Manager setup so you cash in on every impression.

    You now have everything to register CTV App in Google Ad Manager, meet all requirements, follow CTV policy guidelines, and boost revenue with Monetiscope. Ready to get started? Your OTT audience—and your bottom line—await!

    Frequently Asked Questions (FAQ):

    What does it mean to register CTV App in Google Ad Manager?

    It links your CTV app to Ad Manager’s ad demand, sets up ad units, and authorizes your inventory.

    How long does review take for a CTV app?

    Usually 24–48 hours, but it can vary depending on your region and app details.

    Can I edit ad units after approval?

    Yes. You can create or modify ad units anytime under Inventory → Ad units.

    Why is app-ads.txt required for CTV?

    It prevents unauthorized resellers from claiming your ad inventory.

    Which CTV platforms work with Google Ad Manager?

    Roku, Android TV, Apple tvOS, Samsung Tizen, and other IMA-compatible platforms.

    What if my CTV app is unpublished?

    You can still register it, but you must link a placeholder or internal store URL.

    How many ad breaks are allowed per hour?

    Maximum 12 mid-roll breaks per hour—keep it viewer-friendly.

    Can I use Prebid with CTV in Ad Manager?

    Yes. Prebid integrates via the IMA SDK for header bidding on CTV.

    What billing info do I need in Ad Manager?

    Your network’s payment profile with valid bank or tax details.

    How do I fix an “invalid bundle ID” error?

    Double-check your bundle or package ID matches exactly what’s in your store listing.

    Monetize Your App in 2025: The Best Monetization Platforms for Apps You Should Know

    Monetize Your App in 2025: The Best Monetization Platforms for Apps You Should Know

    Let’s face it – building an app is one thing, making money from it is a whole different game. If you’re a developer or publisher trying to squeeze solid revenue from your app, the landscape in 2025 has gotten smarter, faster, and more competitive.

    So, where do you start? Right here. Let’s break down the best monetization platforms and strategies for apps in 2025 that publishers are raving about. We’re talking banners, rewarded ads, SDK bidding, and a whole lot more.

    Best Monetization Platforms for Apps in 2025 – Boost Profits from Day One

    1. All Ad Formats, All Revenue Opportunities

    In 2025, the best app monetization platforms aren’t sticking to just banner ads anymore.

    Here’s what you can now throw into your monetization mix:

    • Banner Ads: Quick to load, non-intrusive, and great for passive income.
    • Open Ads: Shown during app launch or resume. Excellent for impressions.
    • Native Ads: Blend seamlessly into your app’s content. Users barely notice it’s an ad.
    • Interstitial Ads: Full-screen ads between transitions. If placed well, they drive clicks.
    • Rewarded Ads: Users watch an ad in exchange for something – coins, lives, features. Great for engagement.

    The truth is, every format serves a different purpose. Using them smartly is the game-changer.

    2. Open Bidding – Real-Time Ad Auction

    Old-school waterfalls? Yeah, they’re slowly being outpaced. Welcome to Open Bidding.

    Here’s what it does:

    • Multiple demand partners bid for your ad space at the same time.
    • You get the highest paying ad delivered in real-time.
    • There’s no favoritism. Highest bidder wins.

    The result? Better fill rate, higher eCPM, and no manual priority settings.

    3. Diverse Advertisers = Competitive Bidding

    More advertisers = more money.

    That’s the golden rule. Platforms working with 200+ premium advertisers ensure there’s always someone willing to pay more for your inventory.

    When you go with networks offering diverse advertiser access, your CPM won’t suffer even during slow seasons.

    4. SDK Bidding: The New Standard

    SDK Bidding is the engine behind Open Bidding.

    Platforms like AdMob, AppLovin, IronSource, and Monetiscope now support it. Here’s why it’s cool:

    • No manual configuration needed.
    • Automatically fetches bids in real-time.
    • Reduces latency and increases earnings.

    You install one SDK, and boom, you’re getting competitive bids across multiple sources.

    5. Mediation & Waterfall: Still Has Its Place

    Look, Open Bidding is awesome, but Waterfall mediation still works.

    It allows:

    • Control over partner priority
    • Manual price floors
    • Reliable fallback when Open Bidding fails

    Pro tip: Use hybrid mediation. Combine both models for maximum revenue.

    6. Dedicated Support Team – Because You Can’t Do It Alone

    The best platforms come with a team that actually helps you. Like, real people.

    What to expect:

    • Integration help
    • Weekly revenue optimization tips
    • Bug fixing
    • Strategy planning

    You just focus on building your app. Let the pros handle monetization.

    Myth vs. Truth

    MythTruth
    Rewarded ads annoy usersUsers love rewards. It’s voluntary and adds value.
    Banner ads don’t work anymoreStill work great if placed well.
    SDKs slow down appsModern SDKs are lightweight and optimized.
    Open bidding is hard to managePlatforms automate the whole thing. You just watch.
    Mediation is outdatedIt’s still useful when combined with bidding.

    Why Publishers Choose Monetiscope

    Monetiscope isn’t just another ad network. It’s the full stack:

    • Supports all major ad formats
    • Backed by SDK bidding & mediation
    • 200+ premium advertisers for top CPMs
    • Dedicated account managers and devs
    • Transparent dashboard

    They even help you with ad placement strategy. And trust me, that alone can boost earnings.

    Quick Comparison Table

    FeatureMonetiscopeAdMobAppLovinIronSource
    All Ad FormatsYesYesYesYes
    Open BiddingYesYesYesYes
    SDK BiddingYesYesYesYes
    Mediation SupportYesYesYesYes
    Dedicated SupportYesNoLimitedLimited
    Ad Strategy SupportYesNoNoNo
    Transparent ReportingYesYesYesYes

    Final Thoughts

    Monetizing your app in 2025 is about being smart, not just technical. Don’t stick with one format. Don’t rely on one partner. Use platforms that give you flexibility, power, and guidance.

    And if you want to go next level?

    Check out Monetiscope. They’re helping hundreds of apps earn more with less effort.

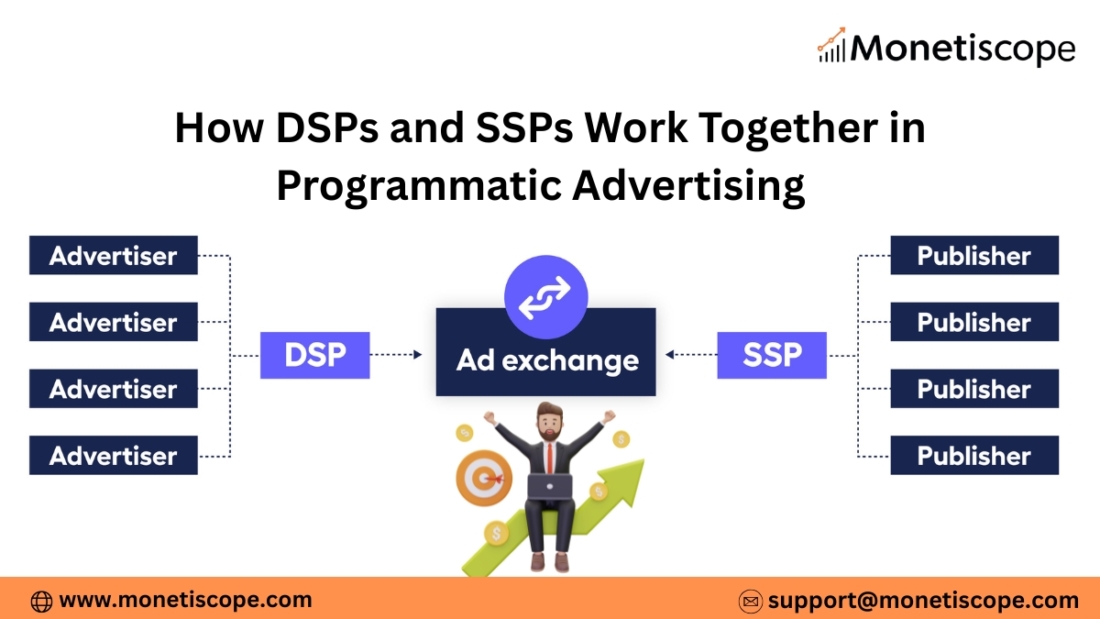
    How DSPs and SSPs Work Together in Programmatic Advertising

    How DSPs and SSPs Work Together in Programmatic Advertising

    In the digital world, programmatic advertising has transformed how ads are bought and sold. It’s fast, data-driven, and largely automated. But to truly understand how programmatic advertising platforms function, you need to know two key players: DSPs (Demand-Side Platforms) and SSPs (Supply-Side Platforms).

    They are the engine behind real-time bidding in programmatic ads. Together, they ensure the right ad appears in front of the right user, at the right time, on the right device—driven by smart DSP and SSP integration.

    Step-by-Step Guide to How DSPs and SSPs Work Together

    Let’s break down how DSPs and SSPs work in programmatic advertising—step by step.

    What is Programmatic Advertising?

    Programmatic advertising is the use of automated software to buy digital ad space. Instead of traditional, manual negotiations between advertisers and publishers, machines do the job in milliseconds.

    Using programmatic tools, advertisers can:

    • Set budgets
    • Define audience targeting
    • Run A/B testing
    • Optimize campaigns in real-time

    The main goal? Show the most relevant ads to users across websites, apps, and devices.

    But this can’t happen without DSPs and SSPs working together.

    What is a DSP (Demand-Side Platform)?

    A Demand-Side Platform is a software used by advertisers to buy ad inventory automatically. It connects advertisers to multiple ad exchanges and SSPs at once.

    With a DSP, advertisers can:

    • Define target audiences based on age, interests, behavior, and location
    • Set bidding strategies
    • Control how much they want to pay for impressions
    • Track campaign performance

    Some popular DSPs include:

    • Google DV360
    • The Trade Desk
    • MediaMath
    • Amazon DSP

    DSPs let advertisers reach users at scale with precision.

    What is an SSP (Supply-Side Platform)?

    On the flip side, a Supply-Side Platform is used by publishers (website or app owners). It helps them sell their ad inventory in real-time.

    SSPs allow publishers to:

    • Connect to multiple ad exchanges and DSPs
    • Set minimum prices (floor price) for ad impressions
    • Manage demand partners
    • Maximize revenue by selling impressions to the highest bidder

    Popular SSPs include:

    In short, SSPs help publishers monetize their content efficiently.

    How Do DSPs and SSPs Work Together?

    Though they serve different sides of the ad ecosystem, DSPs and SSPs are deeply connected. Let’s walk through the entire flow.

    1. A User Visits a Website or App

    Let’s say a user opens a news website. The site has multiple ad slots ready to display ads. Each slot becomes an ad opportunity.

    At this moment, the SSP jumps into action.

    2. SSP Sends a Bid Request

    The SSP scans the available ad inventory and generates a bid request. This request contains data like:

    • Device type
    • Location
    • User behavior (if cookies or IDs are available)
    • Ad slot size and position
    • Publisher ID

    This bid request is sent to multiple DSPs connected to the SSP.

    3. DSPs Evaluate the Bid Request

    Once the DSPs receive the request, they analyze it against their campaign settings.

    Each DSP checks:

    • Does this user match any of my target audience segments?
    • Is this ad slot suitable for my ad creative?
    • What’s the user’s browsing behavior or past actions?
    • How much should I bid for this impression?

    Based on these checks, each DSP decides whether to bid and at what price.

    4. Real-Time Bidding Happens

    This is the core of programmatic advertising.

    Each DSP submits its bid. The SSP collects all bids and selects the highest one—provided it meets the publisher’s floor price.

    This process is called Real-Time Bidding (RTB). It happens in about 100 milliseconds.

    5. Winning Ad is Served

    Once the highest bid is chosen, the SSP sends the ad creative from the winning DSP back to the publisher.

    The ad appears instantly on the user’s screen.

    The entire process—user visit to ad display—takes less than a second.

    6. Data Gets Collected

    Both DSPs and SSPs collect performance data:

    • DSPs track impressions, clicks, conversions, and ROI
    • SSPs track fill rate, CPM, and revenue

    This data helps optimize future campaigns and ad serving.

    Why the Collaboration Between DSPs and SSPs Matters

    The partnership between DSPs and SSPs brings efficiency and scale to digital advertising. Here’s how:

    a. Better Ad Targeting

    DSPs get rich user-level data from SSPs. This allows for sharper targeting based on:

    • Interests
    • Demographics
    • Retargeting data
    • Real-time context

    For example, a DSP may only want to show an ad to users who visited a shopping site in the last 24 hours. The SSP provides this behavioral signal.

    b. Increased Revenue for Publishers

    With SSPs connecting to many DSPs, publishers see more bids per impression. More bids mean higher competition, which usually results in higher CPMs.

    This is especially true with header bidding, where multiple SSPs send bid requests at once.

    c. Real-Time Optimization

    DSPs use machine learning to constantly optimize bids based on:

    • Which sites convert better
    • What times get more clicks
    • Which creatives perform best

    Meanwhile, SSPs can block low-paying bids and favor demand that offers better monetization.

    d. Transparency and Control

    Both platforms offer dashboards where advertisers and publishers can monitor:

    • Performance
    • Bidding patterns
    • Revenue flow
    • Ad quality

    This builds trust in the programmatic ecosystem.

    Key Technologies that Connect DSPs and SSPs

    Several tools and technologies make this connection possible:

    1. Ad Exchanges

    These are the digital marketplaces where SSPs and DSPs meet. Examples include:

    • Google Ad Exchange
    • OpenX
    • AppNexus

    Ad exchanges facilitate the RTB process.

    2. Cookie Syncing & Identity Graphs

    For accurate targeting, DSPs and SSPs need to identify users across platforms. This is where cookie syncing or ID matching comes into play.

    Post-cookie solutions like Unified ID 2.0 or first-party data integrations are also being adopted.

    3. Header Bidding

    Header bidding allows SSPs to offer inventory to multiple DSPs at once—before calling the ad server. This increases competition and improves revenue for publishers.

    4. Server-to-Server (S2S) Integration

    Instead of loading scripts in browsers, S2S setups allow direct communication between DSPs and SSPs on servers. This speeds up bidding and reduces page latency.

    Challenges in DSP and SSP Integration

    Even though the system is smart, it’s not without challenges:

    a. Ad Fraud

    Fake impressions, bots, and spoofed domains still exist. DSPs and SSPs use verification partners like IAS, MOAT, and DoubleVerify to fight fraud.

    b. Latency and Speed

    RTB must happen in milliseconds. If a DSP takes too long to respond, it can miss the auction.

    SSPs constantly optimize how fast they can collect and return bids.

    c. Ad Quality and Relevance

    Low-quality ads can harm a publisher’s reputation. SSPs often set creative approval filters to ensure ad quality.

    d. Privacy and Regulations

    DSPs and SSPs must follow privacy rules like GDPR and CCPA. They handle user consent, data collection, and ID anonymization carefully.

    The Future of DSP and SSP Collaboration

    Programmatic advertising keeps evolving. Here’s what’s next:

    1. AI-Driven Optimization

    Both platforms are using AI to:

    • Predict bidding outcomes
    • Improve targeting accuracy
    • Automatically pause low-performing campaigns

    2. First-Party Data Integration

    As cookies phase out, advertisers will rely on publisher-collected data. DSPs and SSPs will need to connect more directly.

    3. CTV and Audio Expansion

    Programmatic is moving beyond display. Connected TV (CTV) and digital audio are becoming major channels where DSP-SSP interaction is growing.

    4. Supply Path Optimization (SPO)

    Advertisers are looking to simplify their supply paths—fewer intermediaries, more transparency, and better value for money.

    Final Thoughts

    Programmatic advertising wouldn’t function without the seamless connection between DSPs and SSPs.

    While they serve opposite ends—advertisers and publishers—they work together to deliver relevant, real-time ads that make digital marketing more powerful and profitable.

    Understanding their role helps advertisers make better decisions and publishers maximize their ad revenue.

    FAQs – How DSPs and SSPs Work Together in Programmatic Advertising

    1. What’s the main difference between a DSP and an SSP?

    A DSP is for advertisers to buy ad space. An SSP is for publishers to sell it. They connect through ad exchanges.

    Can one platform act as both DSP and SSP?

    Yes, companies like Google and Amazon offer both. However, many brands still prefer using separate, specialized platforms.

    What is an ad exchange?

    It’s a digital marketplace where SSPs and DSPs meet to trade ad inventory via real-time bidding.

    How does real-time bidding work?

    The SSP sends bid requests to multiple DSPs. Each DSP bids based on its campaign goals. The highest valid bid wins.

    Do SSPs control which ads appear?

    Yes, SSPs can block certain ad categories or specific advertisers. They often use filters to maintain ad quality.

    How do DSPs know which users to target?

    They rely on data like browsing behavior, demographics, device info, and third-party or first-party audience segments.

    What is header bidding?

    It’s a method where publishers offer inventory to multiple SSPs at once before the ad server picks a winner. This boosts competition.

    Are DSPs and SSPs impacted by the end of third-party cookies?

    Yes. Both sides are exploring new ways to track users with privacy in mind—like first-party data and universal IDs.

    8 Ad Placement Mistakes That Can Trigger Policy Violations

    8 Ad Placement Mistakes That Can Trigger Policy Violations

    Monetizing your website or app sounds simple—add ads, get paid. But in reality, ad placement needs to follow strict policies. One wrong move, and your account could be penalized—or even banned.

    Ad Placement Mistakes That Can Trigger Policy Violations are more common than you think, especially if you’re optimizing aggressively for revenue. The challenge? Google doesn’t always warn you before taking action. That’s why it’s critical to understand what not to do.

    Let’s break down the most common ad placement mistakes and how to fix them—without killing your earnings.

    1. Ads Too Close to Clickable Elements

    This is one of the easiest mistakes to make. Placing ads too close to navigation buttons, image carousels, menu icons, or other interactive elements can easily trigger accidental clicks. Google considers this a violation—even if unintentional.

    For example, on mobile, if a banner ad sits right beneath a menu button, a user might click the ad while trying to open the menu. That’s a problem.

    Why It’s Risky:

    • It generates invalid traffic and accidental clicks.
    • Google sees it as deceptive behavior.
    • It could reduce your Quality Score and advertiser trust.

    What to Do Instead:

    Add at least 20–30px of padding between ads and clickable UI components. Test placements on multiple screen sizes to ensure no overlap occurs. Prioritize clean design over forced impressions.

    2. Floating or Sticky Ads That Obstruct Content

    Sticky ads—especially on mobile—can boost viewability. But when they cover essential content or make it hard to scroll, you’ve crossed the line.

    Why It’s Risky:

    • It degrades user experience.
    • Obstructive elements violate Google’s Better Ads Standards.
    • Can lead to policy violations or a drop in ad demand.

    What to Do Instead:

    Use collapsible anchor ads or configure sticky units with a clear close button. Make sure they don’t interfere with the page’s content or accessibility.

    Test ads on slow networks and small screens. What looks fine on desktop might be disastrous on a 5-inch phone.

    3. Ads Placed Inside Dropdowns or Expanding Menus

    Ads hidden inside dropdowns, accordions, or expandable tabs might seem clever—but they’re a violation waiting to happen.

    Why? Because these placements are often not immediately visible, yet still generate impressions. Google counts that as “misleading ad serving.”

    Why It’s Risky:

    • It tricks advertisers into paying for impressions that users never saw.
    • It violates viewability standards.
    • It could lead to account warnings or suspensions.

    What to Do Instead:

    Always place ads in fully visible sections of your page. If a menu or tab must contain an ad, make sure it opens automatically and clearly signals its presence. Transparency matters.

    4. Ads Disguised as Content

    This one is a big red flag. If you make an ad look like part of your blog post or news article, users won’t know the difference—and that’s the problem.

    Google’s policies require clear labeling of ads. If a native ad looks exactly like editorial content, it’s considered misleading.

    Why It’s Risky:

    • Violates Google’s misrepresentation policies.
    • Reduces trust in your brand.
    • Can harm long-term monetization potential.

    What to Do Instead:

    Use clear labels like “Sponsored,” “Ad,” or “Advertisement.” Visually separate ads using contrasting backgrounds or borders. It’s okay to use native styles—just don’t blend them too much.

    5. Ads on 404 Pages, Thank You Pages, or No-Content Pages

    This mistake often goes unnoticed. If you’re showing ads on broken pages, empty categories, or “thank you for subscribing” messages, you’re violating ad policies.

    These pages don’t offer real content—so serving ads there is considered “low-value inventory.”

    Why It’s Risky:

    • Google doesn’t want advertisers paying for low-engagement impressions.
    • It can trigger an Ad Serving Limit or full disablement.
    • It affects overall site credibility.

    What to Do Instead:

    Use conditional logic in your ad tags. Make sure ads load only on pages with meaningful content. Exclude thank you pages, search with zero results, or broken links from ad serving.

    6. Multiple Ads Above the Fold (Especially on Mobile)

    Yes, “above the fold” ads perform better—but stacking too many of them is a bad move.

    Google has clear guidelines about content-to-ad ratio. If the first screen is mostly ads, users may bounce, and you could face Better Ads Standard violations.

    Why It’s Risky:

    • Hurts Core Web Vitals like CLS and LCP.
    • Reduces user trust and increases bounce rate.
    • Can lead to policy warnings or revenue dips.

    What to Do Instead:

    Limit to one ad above the fold—preferably a banner or native unit. Let content appear first. This creates a better experience and keeps you compliant.

    7. Interfering with Core Web Vitals

    Ad placements that shift your content or delay page load are now a big concern. Google uses Core Web Vitals to measure performance—and bad ad setups can ruin your scores.

    Why It’s Risky:

    • Causes layout shifts (CLS), slow load (LCP), and user frustration.
    • Lowers your search ranking.
    • May trigger Google Ad Experience Reports and policy flags.

    What to Do Instead:

    Use predefined ad sizes and avoid dynamically injecting ads late. Use lazy loading and prioritize script efficiency. Test your pages with Google’s PageSpeed Insights.

    A good user experience supports both SEO and revenue.

    8. Incentivizing Ad Clicks or Impressions

    You cannot ask users to click on ads—or offer rewards for doing so. This might sound obvious, but many publishers still break this rule unintentionally.

    Phrases like:

    • “Click to support us”
    • “Check out our sponsors”
    • “Earn coins by clicking ads”

    …are all against policy.

    Why It’s Risky:

    • Google treats this as invalid activity.
    • It can lead to account suspension or termination.
    • Advertisers lose trust, and your eCPMs drop.

    What to Do Instead:

    Let your content do the heavy lifting. Never push users toward ad interactions. Focus on engaging, high-quality content that keeps users around—and lets ads perform organically.

    Google Doesn’t Always Warn You

    Here’s the scary part: many publishers think they’re doing everything right—until one day, they get hit with a policy violation email or worse, see a sudden drop in revenue.

    Google often enforces its ad placement policies automatically. That means if you’re making these ad placement mistakes that can trigger policy violations, you might never get a warning.

    You’ll just notice:

    • Ads stop showing.
    • eCPM suddenly drops.
    • Ad serving limits (especially if you’re using AdSense or AdX)
    • Full account suspension or ban

    How to Stay Compliant (and Still Optimize Revenue)

    Good news: You don’t have to choose between compliance and earnings.

    Here’s how to strike the right balance:

    1. Audit Your Layout Regularly

    Check your site or app across devices and browsers. Watch for overlapping ads, mobile glitches, or blocked content.

    2. Follow AdSense and AdX Official Guidelines

    Bookmark and review:

    3. Partner with a monetization expert:

    A reliable monetization partner can help ensure policy compliance while boosting your revenue across multiple ad networks.

    Worried About Ad Placement Violations?

    Reach out to us at support@monetiscope.com
    We’ll audit your setup and help you fix what’s holding you back.

    Final Word

    Avoiding ad placement mistakes that can trigger policy violations is about being thoughtful, not fearful. Follow best practices, stay updated, and don’t hesitate to seek help.

    FAQs – Ad Placement Mistakes That Can Trigger Policy Violations

    What is the biggest ad placement mistake to avoid?

    Placing ads too close to clickable elements is one of the most common and dangerous mistakes. It leads to accidental clicks and invalid traffic.

    Are sticky ads always against Google policy?

    No, but if sticky ads obstruct content or lack a close button, they can violate Google’s guidelines. Use them wisely.

    Can I show ads on search result pages?

    Only if the page contains meaningful results. If a search returns “no results” and still shows ads, that could lead to a policy flag.

    What is considered incentivizing ad clicks?

    Telling users to click on ads, or rewarding them for doing so (coins, points, prizes), is strictly against policy.

    How can I test if ads affect Core Web Vitals?

    Use tools like Google PageSpeed Insights or Lighthouse. Pay special attention to CLS and LCP scores.

    Is it okay to use native ads that blend into content?

    Yes, but they must be clearly labeled with terms like “Ad” or “Sponsored.” Misleading design is not allowed.

    What happens if I get a policy violation notice?

    Google may limit ad serving, reduce fill rate, or suspend your account. Fix the issue immediately and request a review.

    Can ad placement mistakes lower my revenue?

    Absolutely. Even without suspension, poor placement leads to lower viewability, invalid traffic, and lower eCPMs.

    Gaming App Monetization Strategy with Google Ad Exchange

    Gaming App Monetization Strategy with Google Ad Exchange (AdX)

    Gaming apps are among the top revenue-generating categories in the app industry. But building a popular game is only half the battle. The real challenge begins when you try to monetize it. One of the most powerful tools available today for gaming app monetization is Google Ad Exchange (AdX).

    In this article, we’ll explore the complete strategy to monetize your gaming app using AdX. Whether you’re a beginner or an experienced developer, this guide will help you unlock the full revenue potential of your app.

    Why Choose Google Ad Exchange for Gaming App Monetization?

    Google Ad Exchange offers premium demand and better control over your ad inventory. Unlike AdMob, which primarily serves ads from Google’s network, AdX connects you to a wide range of advertisers, including top-tier brands and agencies.

    Here’s why AdX is perfect for gaming apps:

    • Access to high-paying advertisers
    • Real-time bidding (RTB) to increase CPMs
    • Advanced reporting and targeting
    • Better fill rates globally
    • Seamless integration with Google Ad Manager

    Let’s now break down the strategy to effectively use AdX in your gaming app.

    Step 1: Understand Your App and Audience

    Before jumping into monetization, understand your game type and audience.

    Ask yourself:

    • What is the average session time?
    • How frequently do users return?
    • Where are your users located?
    • Are they casual or hardcore gamers?

    These answers will shape your ad format and placement choices. For example, rewarded ads work better in casual games with long playtime.

    Step 2: Get Access to Google Ad Exchange

    Unlike AdMob, AdX access is not open to everyone. You need to go through a certified Google publishing partner like Monetiscope.

    How to Get Access:

    • Partner with a Google AdX reseller or MCM (Multiple Customer Management) partner
    • Sign a managed account agreement
    • Integrate your app into their monetization platform

    Once approved, you can begin setting up inventory in Google Ad Manager (GAM).

    Step 3: Set Up Your Gaming App in Google Ad Manager

    After access, set up your gaming app in GAM.

    Key Setup Steps:

    1. Create Ad Units – Define placements like banner, interstitial, rewarded.
    2. Set Key-Values – Track in-game events and user behavior (e.g., level_complete, powerup_use).
    3. Add Inventory – Register your app under App Settings.
    4. Link SDK – Integrate Google Mobile Ads SDK in your game.

    This setup helps serve and track high-performance ads across all devices.

    Step 4: Choose the Right Ad Formats for Gaming Apps

    Not all ad formats perform equally in games. You must pick formats that enhance, not interrupt, gameplay.

    Best Ad Formats for Gaming Apps:

    1. Rewarded Video Ads

    These give users in-game rewards for watching ads. They have high engagement and eCPM. Use them in places like:

    • Extra lives
    • Bonus coins
    • Unlock levels

    2. Interstitial Ads

    These are full-screen ads shown between game transitions. Limit their frequency to avoid user frustration. Ideal moments include:

    • After level completion
    • Game over screens

    3. Native Ads

    Blend seamlessly with your game’s UI. These work well in menu screens or shop interfaces.

    4. Banner Ads

    Use banners at the top or bottom of the screen. Avoid placing them during active gameplay. Keep them visible on non-intrusive screens.

    5. App Open Ads

    Show these when users reopen the app after inactivity. Ensure they don’t delay the gaming experience.

    Step 5: Optimize Floor Prices and Bidding Rules

    To increase revenue, you need to set smart pricing rules in AdX.

    Key Optimization Tips:

    • Set Dynamic Floor Prices – Increase CPMs during peak hours or geos.
    • Use Unified Pricing Rules – Apply pricing across buyers for consistency.
    • Enable Open Bidding – Let third-party demand sources compete with AdX.

    Test and tweak floor prices regularly. Use historical data to set performance benchmarks.

    Step 6: Segment Your Audience for Better Targeting

    Segmenting users helps serve more relevant ads. More relevant ads mean better engagement and higher payouts.

    Segment by:

    • Geo (e.g., US users vs. India users)
    • Platform (iOS vs. Android)
    • Player behavior (e.g., paying vs. non-paying)
    • Time of day

    Use Google Ad Manager’s key-value targeting to set this up.

    Step 7: Improve Ad Viewability and Engagement

    High viewability leads to better CPMs. Make sure your ad placements are visible and non-intrusive.

    Best Practices:

    • Avoid accidental clicks (no bait placements)
    • Keep rewarded videos optional
    • Use sticky banners on non-interruptive screens
    • Test multiple placements and measure CTR

    Track viewability reports in GAM and remove underperforming units.

    Step 8: Analyze Reports and Improve Continuously

    AdX and GAM offer detailed performance reports. Use them to understand what’s working and what’s not.

    Focus on Metrics Like:

    • eCPM
    • Fill Rate
    • Impression CTR
    • Revenue per user
    • Session duration vs. ad frequency

    Run A/B tests regularly. Change ad frequency, format, and timing to find the sweet spot.

    Step 9: Balance Monetization with User Experience

    Don’t let monetization ruin your game. If players feel bombarded by ads, they’ll leave—and your revenue will drop.

    Balancing Tips:

    • Limit interstitials to 1 per session or per level
    • Always let users skip rewarded videos
    • Keep banners away from main action buttons
    • Offer an ad-free version via in-app purchase (IAP)

    Happy users lead to higher retention and lifetime value.

    Step 10: Stay Updated with Google Policy and AdX Trends

    Google frequently updates policies and ad delivery mechanisms.

    Stay Compliant by:

    • Reading Google’s Ad Policy Center regularly
    • Testing ads on real devices before going live
    • Avoiding deceptive placements
    • Keeping SDKs and APIs up to date

    Also, explore new formats like interactive or playable ads as they emerge.

    Bonus Tip: Hybrid Monetization = More Revenue

    Don’t rely only on ads. Combine AdX ads with in-app purchases (IAP).

    Some players hate ads but will pay to remove them. Others will watch ads for rewards. A hybrid strategy captures both segments.

    You can also try direct brand deals once your DAU (daily active users) grows.

    Final Thoughts

    Monetizing your gaming app with Google Ad Exchange is a smart move. But it requires the right strategy, careful testing, and constant optimization. Focus on user experience first—ads should complement gameplay, not ruin it.

    FAQs on Gaming App Monetization with Google Ad Exchange

    What is Google Ad Exchange (AdX)?

    AdX is a premium ad marketplace by Google. It connects publishers with high-quality advertisers using real-time bidding.

    How is AdX different from AdMob?

    AdMob is easy to start with but offers limited demand. AdX offers better CPMs, advanced controls, and premium brand ads.

    Can I use both AdMob and AdX together?

    Yes, you can. Use AdMob for fallback or mediation. Set AdX as the primary source for high-value inventory.

    Do I need a certified partner to access AdX?

    Yes. You need to work with a Google Publishing Partner (like Monetiscope) to gain access to AdX.

    What are the best ad formats for gaming apps?

    Rewarded video and interstitial ads work best. They fit naturally into gameplay and generate strong returns.

    How can I increase my app’s eCPM with AdX?

    Segment users, test floor prices, and improve ad placements. Also, focus on rewarded formats and premium geos.

    Will ads affect my app’s retention?

    If done wrong, yes. But well-timed and user-friendly ads can enhance experience and even boost retention.

    What is the ideal ad frequency for gaming apps?

    There’s no fixed rule. Start with 1 interstitial per level or every 3–5 minutes. Adjust based on user behavior.

    An In-Depth Guide to Using Google Analytics 4 (GA4) – Features, Setup & Tips

    An In-Depth Guide to Using Google Analytics 4 (GA4) – Features, Setup & Tips

    In the ever-evolving world of digital marketing, understanding user behavior is crucial. Google Analytics 4 (GA4) is the latest version of Google’s analytics platform. It’s designed to help marketers and business owners track and analyze user interactions across websites and apps.

    This guide will walk you through GA4 step by step. Whether you’re a beginner or migrating from Universal Analytics, you’ll gain clear insights into setup, features, reports, and strategies to unlock the power of GA4.

    1. What is Google Analytics 4 (GA4)?

    Google Analytics 4 is a powerful web analytics tool developed by Google. It tracks user behavior across websites and mobile apps. GA4 replaces Universal Analytics and uses event-based tracking instead of session-based tracking.

    This shift means more detailed data and better cross-platform analysis. GA4 focuses on user journeys, not just page views.

    2. Key Differences Between GA4 and Universal Analytics

    Understanding the differences is essential if you’re used to Universal Analytics (UA):

    FeatureUniversal Analytics (UA)Google Analytics 4 (GA4)
    Tracking ModelSession-basedEvent-based
    Data StreamsSeparate for web and appCombined (web + app)
    ReportingPre-defined reportsCustomizable reports
    Bounce RateAvailableReplaced with engagement metrics
    Machine LearningLimitedDeep integration
    User PrivacyLess flexibleEnhanced controls and GDPR-friendly

    3. Setting Up Google Analytics 4 (GA4) on Your Website

    Step 1: Create a GA4 Property

    1. Go to your Google Analytics account.
    2. Click “Admin” and select your desired account.
    3. Under “Property,” click “Create Property.”
    4. Enter property name, time zone, and currency.
    5. Choose “Web” or “App” as the data stream.

    Step 2: Add Data Stream

    1. Choose Web to track your website.
    2. Enter your website URL and stream name.
    3. Enable enhanced measurement options.
    4. Click “Create Stream.”

    Step 3: Install the Tracking Tag

    Use Google Tag Manager (GTM) or Global Site Tag (gtag.js):

    • For GTM: Add a GA4 Configuration tag and paste your Measurement ID.
    • For gtag.js: Paste the provided code into the <head> section of your website.

    4. Understanding the Google Analytics 4 Interface

    Once GA4 is set up, explore the dashboard. You’ll see key areas like:

    • Home: Quick overview of users, traffic, and trends.
    • Reports: Detailed sections for user acquisition, engagement, monetization, and retention.
    • Explore: Create custom reports and use analysis techniques.
    • Advertising: Monitor campaign performance across platforms.
    • Configure: Set up custom events, conversions, and audiences.

    Each section helps you analyze your user journey better.

    5. How Events Work in GA4

    In GA4, everything is an event. No more goals or pageviews-only tracking. You now track:

    • Automatically collected events: Like page views, session starts.
    • Enhanced measurement events: Like scrolls, site search, outbound clicks.
    • Recommended events: Like purchases, sign-ups, and logins.
    • Custom events: Anything you define with a custom name.

    Example:

    Instead of tracking a “pageview,” GA4 logs an event called page_view.

    6. Tracking Conversions in GA4

    Conversions are critical actions you want users to take. To track conversions:

    1. Go to “Configure” → “Events.”
    2. Find the event (like purchase or sign_up).
    3. Toggle the switch to mark it as a conversion.

    You can also create custom events and then mark them as conversions.

    Tips:

    • Use clear naming for custom events.
    • Ensure proper tagging in GTM or code.

    7. Creating Audiences in GA4

    Audiences help you segment users for remarketing or analysis. You can define them based on:

    • Demographics
    • Device type
    • Source/medium
    • Behavior (like “visited checkout page”)

    To create one:

    1. Go to “Configure” → “Audiences.”
    2. Click “New Audience.”
    3. Choose suggested templates or build custom rules.

    8. Reports Overview in GA4

    GA4 has fewer pre-set reports than UA. However, they’re more flexible and focused. Key reports include:

    a. Acquisition

    Shows how users found your site (organic, paid, direct, etc.).

    b. Engagement

    Shows what users did on your site—page views, scrolls, video views.

    c. Monetization

    For eCommerce and app purchases, shows revenue, item views, and purchases.

    d. Retention

    Helps analyze how often users return to your site or app.

    9. Using the Explore Tool (Advanced Analysis)

    The “Explore” tab is where GA4 shines for deep analysis. You can create:

    • Funnel Analysis: Visualize user flow from start to finish.
    • Path Analysis: See the steps users take through your site.
    • Segment Overlap: Understand common behaviors among user groups.
    • Cohort Analysis: Track behavior of user groups over time.

    This section offers drag-and-drop reports, perfect for data storytelling.

    10. Google Analytics 4 and Google Ads Integration

    GA4 connects directly with Google Ads for better campaign tracking. You can:

    • Share audiences between platforms.
    • Track post-click behavior in detail.
    • Measure conversions across devices.

    To Link:

    1. In GA4, go to “Admin” → “Google Ads Linking.”
    2. Select your account and complete setup.

    11. Setting Up E-commerce Tracking in Google Analytics 4

    For online stores, GA4 eCommerce tracking provides powerful insights.

    Basic Setup:

    1. Use GTM or gtag.js to push purchase and item data.
    2. Enable “Monetization” in your data stream.
    3. Track events like view_item, add_to_cart, begin_checkout, and purchase.

    Recommendation:

    Use Google’s developer documentation to set parameters correctly.

    12. Setting Up Cross-Platform Tracking

    GA4 lets you track users across websites and mobile apps. This creates a full user journey.

    To set up:

    • Add both app and web streams to the same GA4 property.
    • Use the same user ID across platforms for consistency.

    13. Data Retention and User Privacy in GA4

    GA4 comes with improved privacy features. You can:

    • Set data retention periods (2 or 14 months).
    • Anonymize IP addresses by default.
    • Disable ads personalization for specific events.

    These controls help comply with GDPR, CCPA, and other laws.

    14. GA4 Best Practices for Better Insights

    1. Plan your events structure early.
    2. Use consistent event naming conventions.
    3. Leverage Explore for deeper insights.
    4. Regularly check engagement metrics over bounce rate.
    5. Use UTM parameters to track marketing sources.

    15. Common GA4 Mistakes to Avoid

    • Not marking key events as conversions.
    • Ignoring data discrepancies after migration.
    • Over-relying on automatic tracking without validation.
    • Not exploring advanced analysis reports.
    • Forgetting to test tags and events before going live.

    16. Migrating from Universal Analytics to GA4

    Since Universal Analytics stopped processing data on July 1, 2023, migration is essential.

    Steps:

    1. Set up GA4 property (if not done).
    2. Duplicate important UA goals as GA4 events.
    3. Rebuild audiences and filters.
    4. Export UA historical reports for backup.

    17. Future of GA4: What to Expect

    Google is continuously improving GA4. Expect more automation, machine learning features, and predictive analytics.

    Stay updated with the GA4 changelog and explore beta features.

    Conclusion

    Google Analytics 4 brings a more user-focused and flexible approach to analytics. With event-based tracking, enhanced customization, and machine learning, GA4 sets a new standard.

    Whether you’re running a blog, eCommerce store, or mobile app, GA4 helps you understand users and optimize performance. Take time to learn the platform, customize it for your goals, and explore its powerful features.

    FAQs About Google Analytics 4 (GA4)

    Is GA4 free to use?

    Yes, GA4 is completely free like Universal Analytics.

    Can I use GA4 and UA together?

    You could, but UA has stopped processing new data since July 2023.

    How long does GA4 store data?

    You can choose between 2 and 14 months for event-level data.

    Does GA4 track IP addresses?

    No, GA4 anonymizes IP addresses by default.

    How can I export GA4 data?

    You can export reports manually or use BigQuery for advanced exporting.

    Do I need to know coding to use GA4?

    Basic use doesn’t need coding. For custom events, some code or GTM knowledge helps.

    How do I track button clicks in GA4?

    Set up a click event tag using Google Tag Manager and define the trigger.

    Can I still see bounce rate in GA4?

    GA4 replaces bounce rate with “engagement rate,” offering deeper insights.

    How to Grow and Monetize Your App on Android and iOS

    How to Grow and Monetize Your App on Android and iOS

    How to Grow and Monetize Your App on Android and iOS is a question every developer faces after launching their product. Building a mobile app is only the first step. The real challenge begins with growing and monetizing it. Whether your app is on Android, iOS, or both, strategic growth and monetization are essential for long-term success.

    In this guide, we’ll break down the steps you need to follow to grow your app’s user base and generate consistent revenue. We’ll also introduce Monetiscope, a company that helps developers like you unlock the full monetization potential of your app.

    Understanding How to Grow and Monetize Your App: A Complete Breakdown

    Step 1: Build a High-Quality App

    You can’t grow or monetize a poor product. Quality comes first.

    • Solve a real problem: Apps that offer real value grow faster.
    • Keep UI simple: A clean, intuitive design keeps users engaged.
    • Ensure fast loading times: Slow apps get deleted quickly.
    • Remove bugs early: Frequent crashes kill retention.

    💡Tip: Launch a minimum viable product (MVP), then improve based on feedback.

    Step 2: Optimize for App Store Discovery (ASO)

    If users can’t find your app, they won’t download it. App Store Optimization (ASO) is the SEO of mobile apps.

    Key ASO tips:

    • Use relevant keywords in your title and description.
    • Add high-quality screenshots and a demo video.
    • Encourage users to leave reviews.
    • Choose the right app category.

    Regularly update your ASO strategy. Trends change fast in the app world.

    Step 3: Leverage Paid Marketing Channels

    Don’t rely only on organic traffic. Paid ads can drive faster installs.

    Effective ad platforms:

    Start with a small budget. Test different creatives. Then scale what works.

    Also, retarget users who dropped off. It’s cheaper to re-engage than to acquire new users.

    Step 4: Focus on User Retention

    Getting users is hard. Keeping them is even harder.

    Proven retention strategies:

    • Push notifications (but avoid spamming)
    • In-app messages to guide new users
    • Loyalty programs or streak rewards
    • Personalization using user behavior

    Track metrics like Day 1, Day 7, and Day 30 retention. Improve these over time.

    Step 5: Grow Through Community and Referrals

    Let your users help you grow.

    What works:

    • Add in-app referral rewards.
    • Create a community on Discord, Reddit, or Facebook.
    • Partner with influencers in your niche.
    • Run contests and giveaways.

    People trust friends and creators more than ads. Use that to your advantage.

    Step 6: Test Monetization Models Early

    Don’t wait too long to start monetizing. Users need to get used to your monetization strategy.

    Common monetization options:

    1. In-App Ads
      Works well for free apps with large user bases. Show ads without disrupting experience.
    2. In-App Purchases (IAPs)
      Perfect for gaming, tools, or freemium apps. Offer virtual goods, upgrades, or unlocks.
    3. Subscription Models
      Useful for content, productivity, or fitness apps. Offer value monthly or yearly.
    4. Paid Apps
      Rare but can work if your app solves a niche problem better than anyone else.

    Test combinations. For example, a free app with ads and optional in-app purchases.

    Step 7: Use Monetiscope to Maximize Revenue

    Most app developers struggle with monetization. That’s where Monetiscope comes in.

    What is Monetiscope?

    Monetiscope is a mobile app monetization partner. It helps developers increase ad revenue by providing full access to Google Ad Exchange (AdX) and advanced ad optimization tools.

    What does Monetiscope offer?

    • Access to Google ADX (beyond basic AdMob)
    • Higher fill rates and CPMs
    • Intelligent ad placement guidance
    • Floor price management and open bidding
    • Real-time dashboard and analytics
    • Hands-on support and troubleshooting

    Whether you have an Android or iOS app, Monetiscope customizes your ad stack for maximum performance.

    Step 8: Use Analytics to Guide Growth

    Data tells you what’s working and what’s not. Don’t rely on guesswork.

    What to track:

    • Daily and monthly active users (DAU/MAU)
    • Retention rates (D1, D7, D30)
    • Lifetime value (LTV)
    • Revenue per user (ARPU)
    • Funnel drop-offs and conversion rates

    Use tools like Firebase, Adjust, Appsflyer, or Mixpanel. Let data shape your next update.

    Step 9: Update Regularly and Communicate

    Apps that feel “alive” retain more users.

    Keep users engaged by:

    • Rolling out frequent updates
    • Fixing bugs and improving UI/UX
    • Adding new features based on user feedback
    • Announcing updates via in-app messages and social media

    Also, reply to reviews. Show users that you care and listen.

    Step 10: Prepare for Scaling

    When growth happens, be ready to handle it.

    • Upgrade your servers or backend if needed.
    • Automate crash reporting and bug tracking.
    • Use CI/CD pipelines for faster releases.
    • Add localization to support international users.

    Scaling isn’t just about traffic—it’s about sustaining quality.

    Final Thoughts

    Growing and monetizing an app is a continuous process. It’s a mix of product, marketing, and smart monetization strategies. With the right tools and partners like Monetiscope, you can turn your app into a strong, revenue-generating product.

    Don’t wait to start optimizing. Every small step adds up over time.

    Frequently Asked Questions (FAQ)

    What is the best way to monetize a free app?

    The best method depends on your audience. In-app ads, in-app purchases, and freemium models are common. Use Monetiscope to optimize ads for better revenue.

    What’s the difference between AdMob and Google AdX?

    AdMob is basic. Google AdX offers premium demand, better CPMs, and advanced controls. Monetiscope provides access to Google AdX with managed services.

    How soon should I start monetizing my app?

    Start testing monetization early—ideally from the MVP stage. This helps set user expectations and gives you data to improve.

    How can I increase app downloads organically?

    Use App Store Optimization (ASO), encourage user reviews, maintain high ratings, and update your app frequently. Leverage social media and influencer marketing.

    How does Monetiscope help developers?

    Monetiscope boosts ad revenue using Google ADX access, intelligent pricing, optimized ad placements, and ongoing expert support.

    Can I use ads and subscriptions together?

    Yes. Many apps combine ad monetization with subscriptions. Ads serve free users; subscriptions offer an ad-free or premium experience.

    How much can I earn from in-app ads?

    It varies based on user location, ad formats, app niche, and optimization. With Monetiscope, CPMs are typically higher than standard networks like AdMob.

    How do I reduce app uninstalls?

    Improve onboarding, avoid excessive ads, fix bugs quickly, and personalize the user experience. Push notifications can also help retain users.

    Get AdX approval on apps

    How to Get AdX Approval on Apps: Complete Guide for Publishers

    If you’re a mobile app publisher looking to monetize beyond AdMob, Google Ad Exchange (AdX) is a big step up. AdX gives you access to premium demand sources, higher eCPMs, and advanced yield management. However, getting AdX approval for apps is not as simple as signing up. You need to meet certain requirements and follow the right steps. In this guide, we will explain how to get AdX approval on apps, what requirements you must meet, and how Monetiscope can help you make the most out of AdX.

    Why AdX Over AdMob? AdX vs AdMob

    Many publishers start with AdMob. It’s easy to use and beginner-friendly. But once your app grows, AdMob can fall short. Here’s why AdX is the better choice:

    • Higher eCPM: AdX gives you access to real-time bidding and premium demand.
    • More Control: Set floor prices, block low-quality ads, and choose ad formats.
    • Increased Fill Rate: Open bidding increases competition for every impression.
    • Detailed Reporting: AdX offers deeper data insights compared to AdMob.
    • Customization: Fine-tune your monetization strategy based on user geography, behavior, and device.

    Minimum Requirements to get AdX Approval on Apps

    To get approved for AdX, your app needs to meet certain quality and performance benchmarks. These include:

    1. App Store Presence

    Your app must be live on a recognized and trusted app store. That includes:

    2. Install Base

    A minimum of 10,000+ installs is typically required. This shows user interest and app viability.

    3. Revenue Potential

    Your app should have a monthly earning potential of $2,000 or more. This indicates you have enough ad impressions to attract interest from Google and advertisers.

    4. App Rating and Reviews

    Maintain a 3.5+ average rating and ensure negligible negative reviews. Google reviews your app’s credibility and user satisfaction.

    5. User Experience

    The app must offer a clean UI, fast loading times, and bug-free operation. Avoid unnecessary redirects or excessive permissions.

    6. High-Value Content

    Apps with original, engaging, or utility-driven content stand a better chance. Avoid low-effort apps like wallpaper changers or single-function calculators.

    7. Policy Compliance

    Ensure your app adheres to Google policies, including:

    • No misleading content
    • No excessive ads
    • No policy violations in past suspensions or bans

    Step-by-Step Guide to Apply for AdX on Apps

    1. Evaluate Readiness: Check if your app meets the above-mentioned requirements.
    2. Partner With a Google AdX Reseller: Direct access to AdX is limited. Work with a certified partner like Monetiscope.
    3. Share App Details: Provide your app’s name, package ID, store link, user stats, email id, network code (if available) and ad revenue data.
    4. AdOps Review: Our team at Monetiscope will audit your app for eligibility.
    5. Submit for Approval: Once verified, we submit your app to Google for review.
    6. Implementation: After approval, we assist you with ad tag integration and monetization optimization.

    Apply Now

    Monetiscope Smart Dashboard & Services

    We go beyond just approval. Here’s how Monetiscope makes AdX work better for you:

    1. Smart Real-Time Reporting

    Track your earnings, impressions, eCPMs, and fill rates in real-time with our intuitive dashboard. This allows faster decisions and better revenue tracking.

    2. Revenue Optimization

    We apply floor pricing strategies based on region, time of day, and user behavior. This helps increase your average eCPM and total revenue.

    3. Better Fill Rate

    By using multiple demand sources and open bidding, we increase ad fill rate. No more lost revenue from unfilled inventory.

    4. Dedicated Support

    Our team offers 24/7 support via WhatsApp, Teams, and email. We guide you through approval, setup, and troubleshooting.

    5. Flexible Revenue Share

    We offer one of the most competitive revenue shares in the market. No hidden fees. Full transparency.

    6. Multiple Ad Formats

    Choose from banners, interstitials, native, open ads, and rewarded video. We help select formats that align with your UX.

    7. Ad Implementation Help

    We provide all JS tags, SDK support, and hands-on integration assistance so you don’t need to be a developer to get started.

    Final Thoughts

    Getting AdX approval for your app can be a game-changer. While the entry bar is high, the benefits are even higher. With the right partner, like Monetiscope, you can unlock premium monetization, expert support, and long-term growth.

    If you meet the criteria, let’s get your app into AdX and start boosting your revenue today.

    Visit: www.monetiscope.com
    Contact: support@monetiscope.com | WhatsApp: +91 9354200141 | Teams ID: live:.cid.1d059701526ed0e3

    FAQs

    Q1. Can I apply for AdX if my app is not on the Play Store?

    You need to be live on a credible app store like Play Store, Apple Store, or Samsung Galaxy Store.

    Q2. What if my app has under 10k installs?

    You can apply, but approval chances are low. Focus on growing users first.

    Q3. Does Monetiscope charge for AdX approval?

    No upfront fees. We only earn from a revenue share after your app starts monetizing.

    Q4. Can I use AdX and AdMob together?

    Yes, you can use both. But we recommend optimizing through AdX for better yield.

    Q5. How long does approval take?

    Typically 1 to 7 working days, depending on the app quality and review timeline.

    Q6. What kind of apps usually get rejected?

    Low-value apps with spammy content, poor UX, or excessive ads usually fail the review.

    Q7. Can I track performance live?

    Yes, Monetiscope’s dashboard provides real-time tracking and historical reports.

    Q8. Who do I contact for support?

    You can reach our team via WhatsApp, Email, or Microsoft Teams. We offer 24/7 assistance.